Halo 2 uses an automatically generated pathfinding mesh using the collision mesh of the BSP as the base. It takes this mesh and adds scenery and instance geometry collision meshes. It then removes any faces that have a slope greater than 45 degrees (and therefore not considered walkable) and then optimises the mesh so it's only made up of convex sectors and uses the minimum number of sectors possible. This is a rather complicated process and somewhat fragile - it will fail if the BSP has any open edges. See figures 1-4 for examples.

Figure 1. An outside section of 01a_tutorial with collision geometry edges highlighted in green.
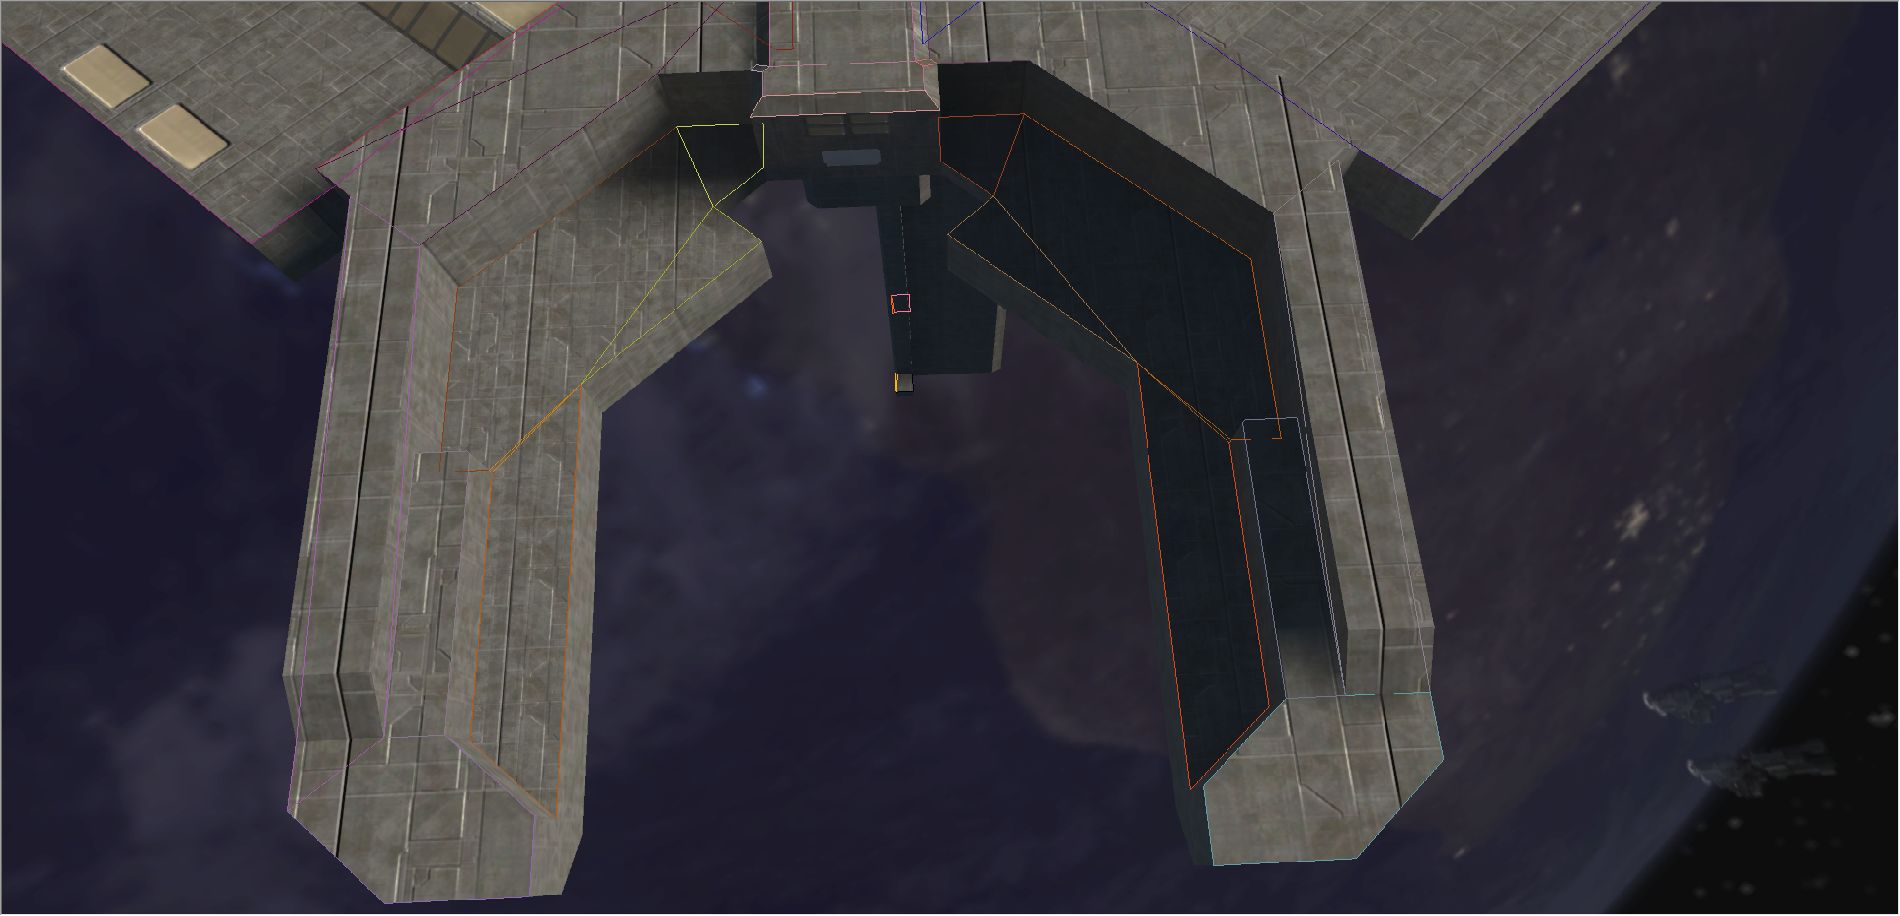
Figure 2. The same area as figure 1 but now with the pathfinding mesh rendered over the geometry. Each sector uses a different colour. Most surfaces were removed and some where got joined together
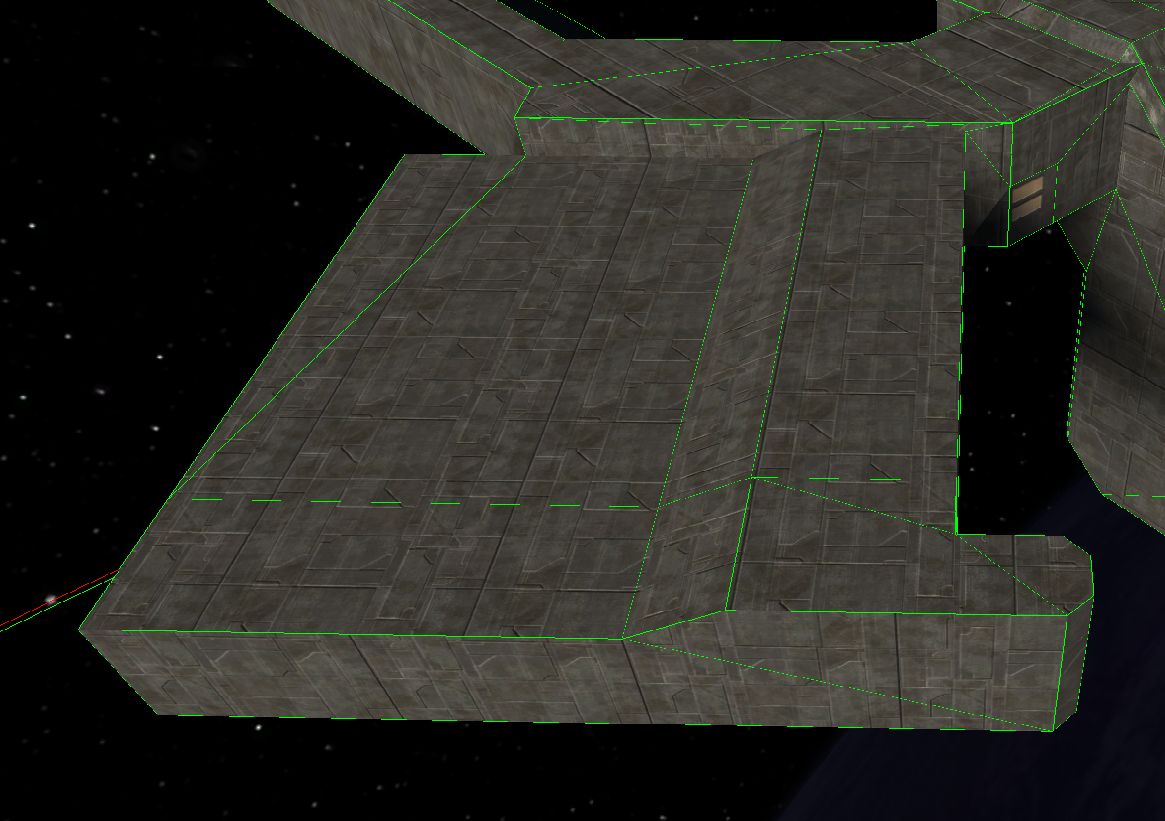
Figure 3. Another outside section of 01a_tutorial with collision geometry edges highlighted in green.
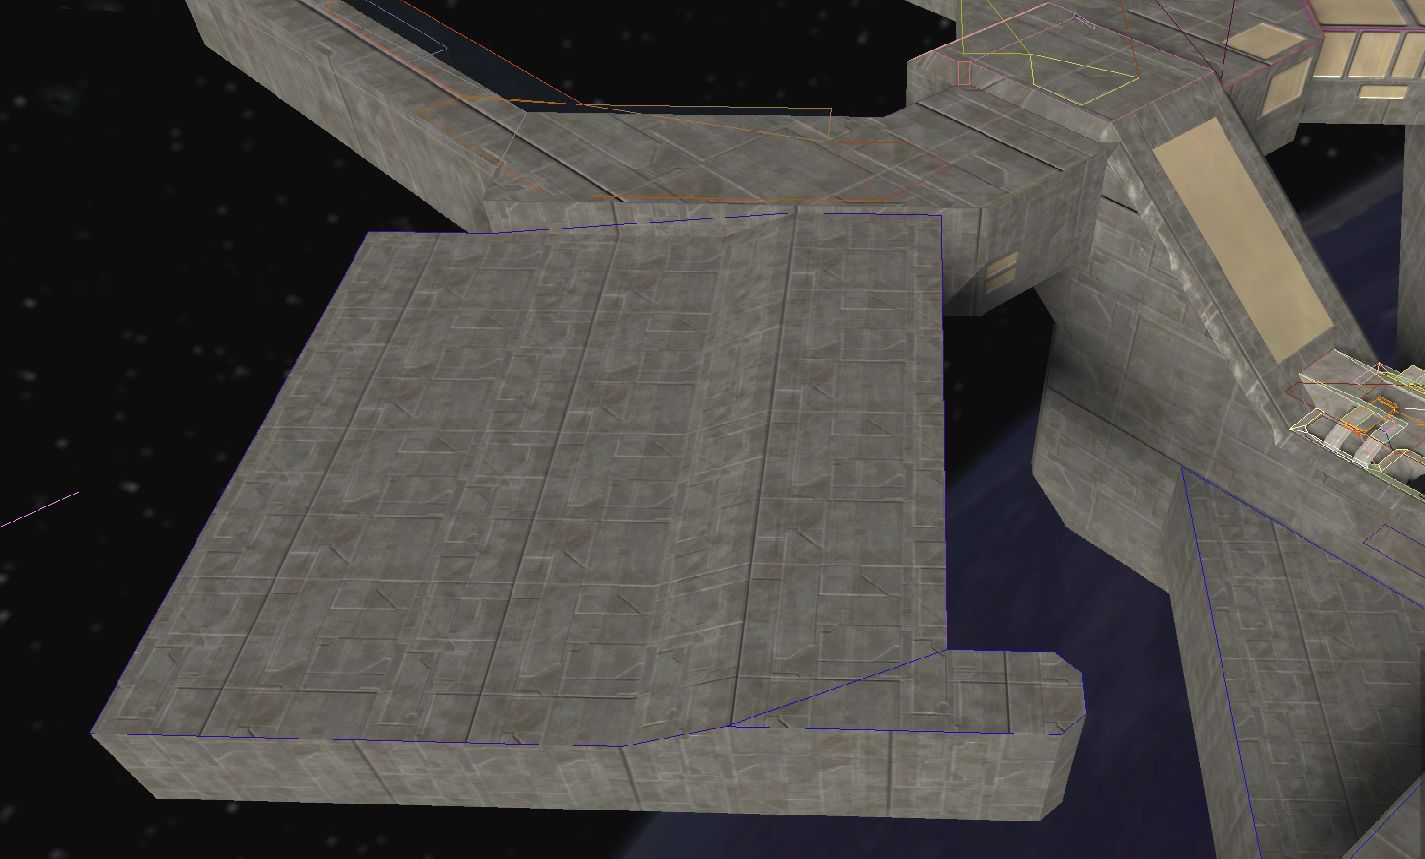
Figure 4. The same area as figure 3 but pathfinding render. It is more clear in this example that multiple surfaces can be merged into one sector
As a level designer/map maker you have limited control over the whole process. There are some settings for the generator but most are not user facing and are likely only meant to be tweaked by developers that understand the whole process.
Pathfinding polices
The main setting you control as a map maker is the pathfinding policy used by scenery objects.
Dynamic
Used by device machines and the like. All surfaces are included in the mesh.
Cut-out
The object will be "cut-out" from the pathfinding mesh. AI will not be able to walk on or over the object but will be able to navigate around this. This is a reasonable choice most objects in the playable area.
Static
The object will be added to the pathfinding mesh. AI will be able to walk on it. Use this for large objects AI might end up on.
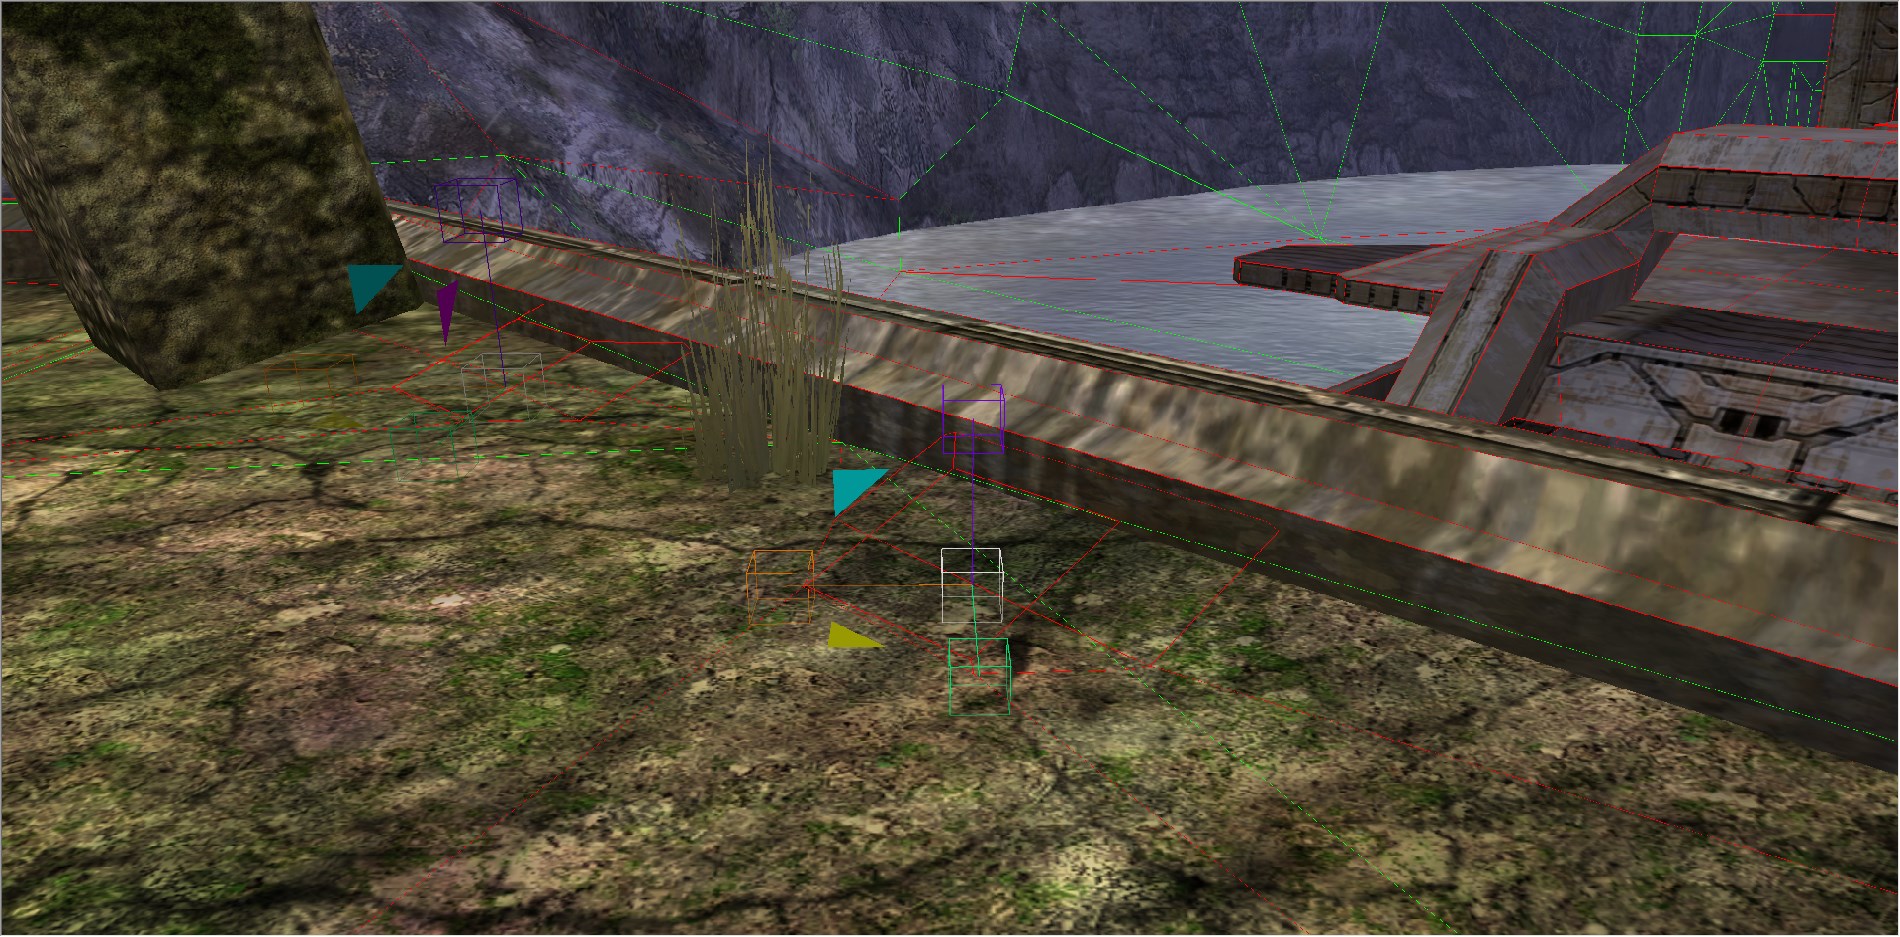
Figure 5. An example of static collision with BSP collision in green (debug_structure 1) and pathfinding mesh rendered in red (ai_render_sectors 1).
None
The object will be ignored by the pathfinding system. It will not affect the mesh. Can be used for objects that won't imped the AI or objects outside the playable area.
Hints
The pathfinding mesh just tells the AI where it can walk and possible paths between two points. To do anything more "intelligent" like dropping down from a ledge or climbing over an obstacle.
Many hints are autogenerated but they can also be placed manually using Sapien. You can render manually placed hints (often called user hints) using ai_render_user_hints 1 or by selecting that hint type in the hierarchy (under AI ⇒ Pathfinding data ⇒ Hints) which will also let you edit them.
Automatically generated hints can be viewed using ai_render_hints 1.
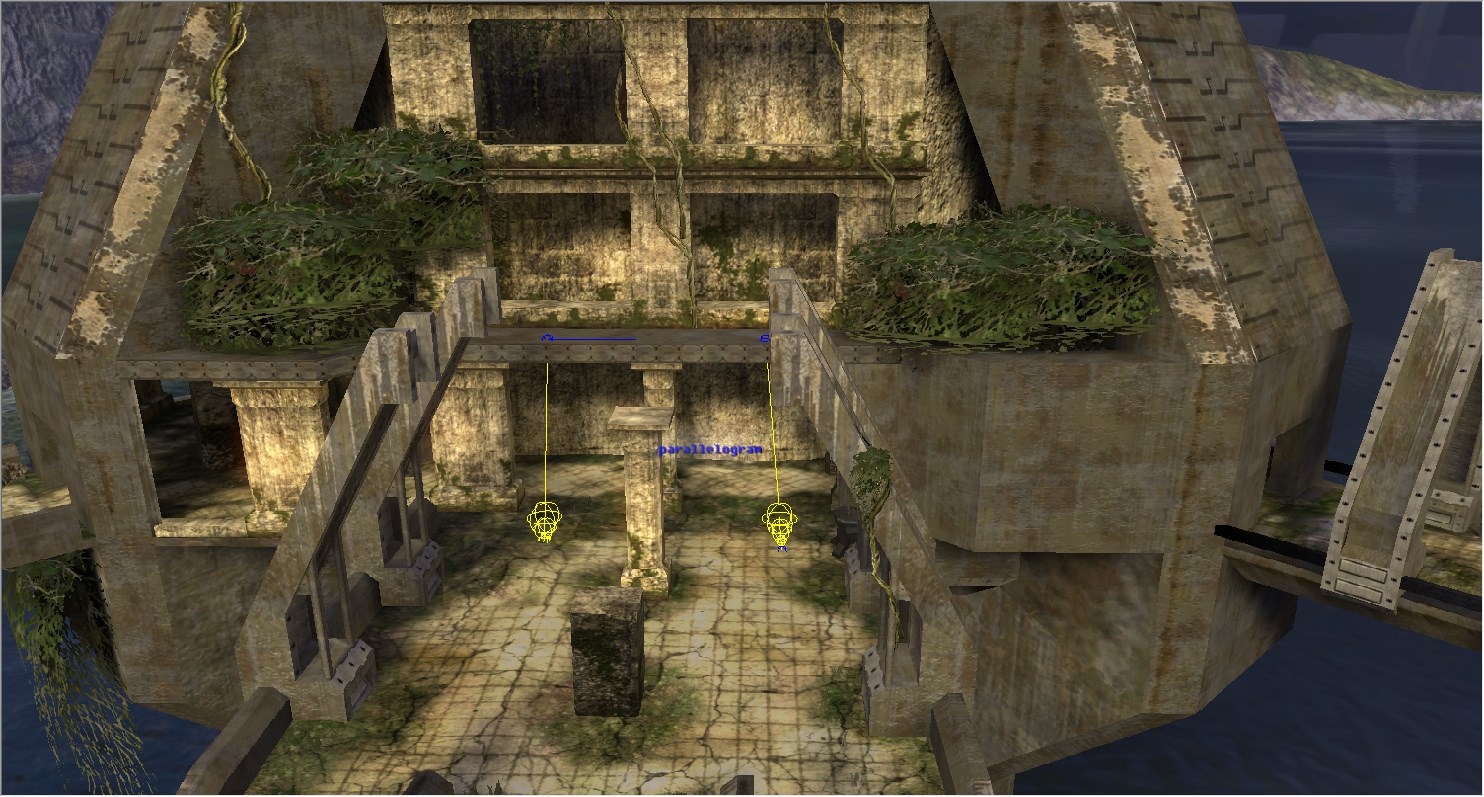
Figure 5a. User placed hints on 05b_deltatowers.
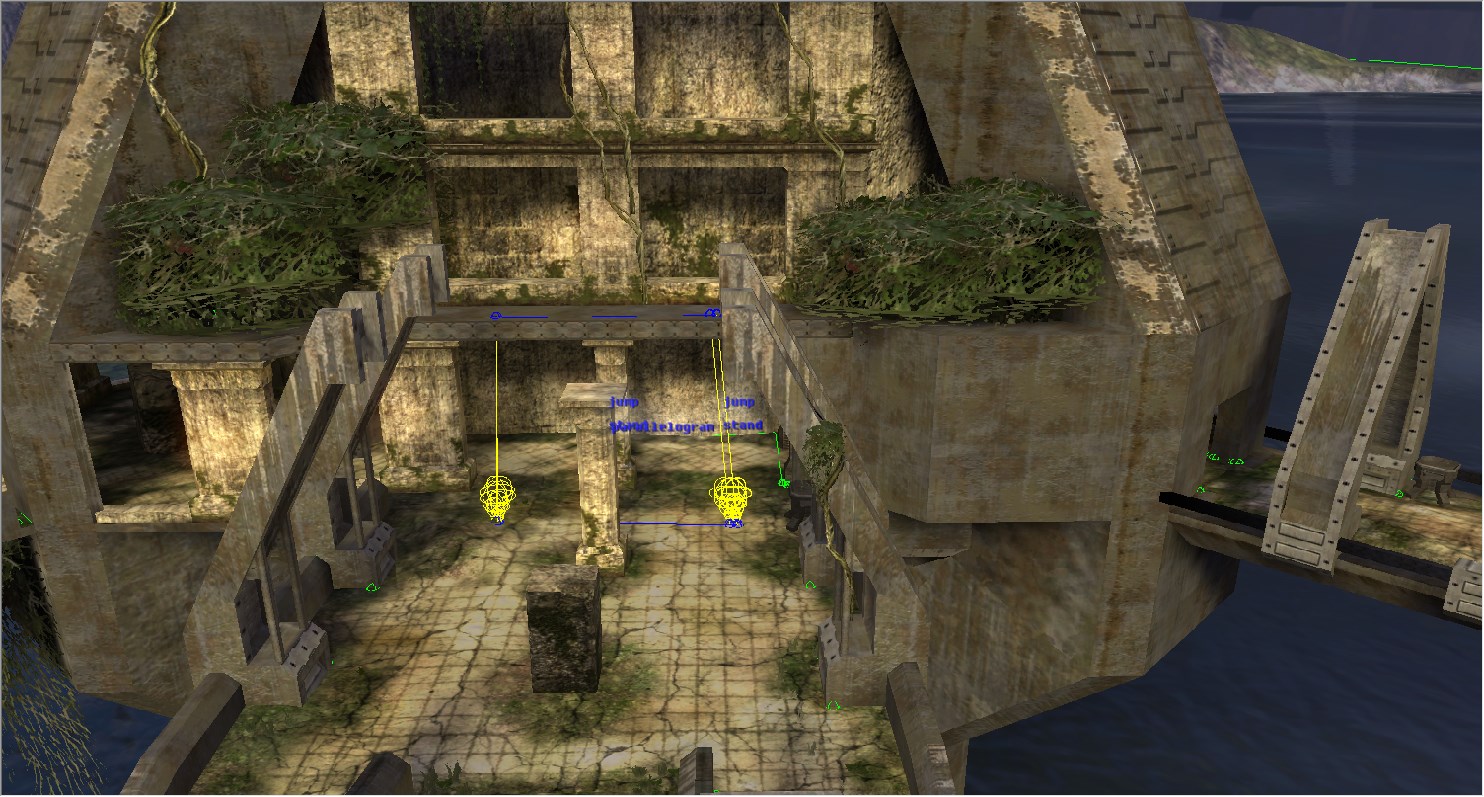
Figure 5b. User placed and autogenerated hints on 05b_deltatowers. Note how the user placed jump hints and autogenerated jump hints line up. The autogenerated jump hints are based off the user hints. If you edit the user hints and regenerate the pathfinding they will change.
Object hints
Used by some crates use hints. These aren't configured through the scenario/BSP like the other hints are work somewhat differently. They are defined by the object. Like other hints they help the AI navigate the environment by allowing them to climb onto the crate, etc. You can render the "active" object hints using ai_render_object_hints 1. If you want to see all the hints the engine can use then use ai_render_object_hints_all 1.
Here is a listing of the types of hints AI can use..
hint_bunker
hint_corner_left
hint_corner_right
hint_vault_crouch
hint_mount_crouch
hint_hoist_crouch
hint_hoist_stand- Bunker - Hides behind object for cover and shoots over.
- Corner - Hides at a corner of the object for cover.
- Vault - Jumps over the object.When debugging hints these will be marked with the letter V colored green.
- Mount - Jumps on top of the object. When debugging hints these will be marked with the letter M colored orange.
- Hoist - Climbs on object. When debugging hints these will be marked with the letter H colored in blue.
Each hint will also have an assigned height for the action. Bunker and corner hints are excluded from this:
- Crouch - Use crouch animations for a medium sized object. Applies to vault, mount, and hoist.
- Stand - Use standing animations for a large sized object. Applies to hoist only.
You can find the set world units for crouch and stand in the AI Globals tag block in the globals tag
Debugging Tips
Pathfinding edges can be rendered using ai_render_sectors 1, this should give you an idea of how complex the pathfinding mesh is but doesn't actually tell you that much. You can render more information about which sector is where using ai_render_sector_bsps 1.
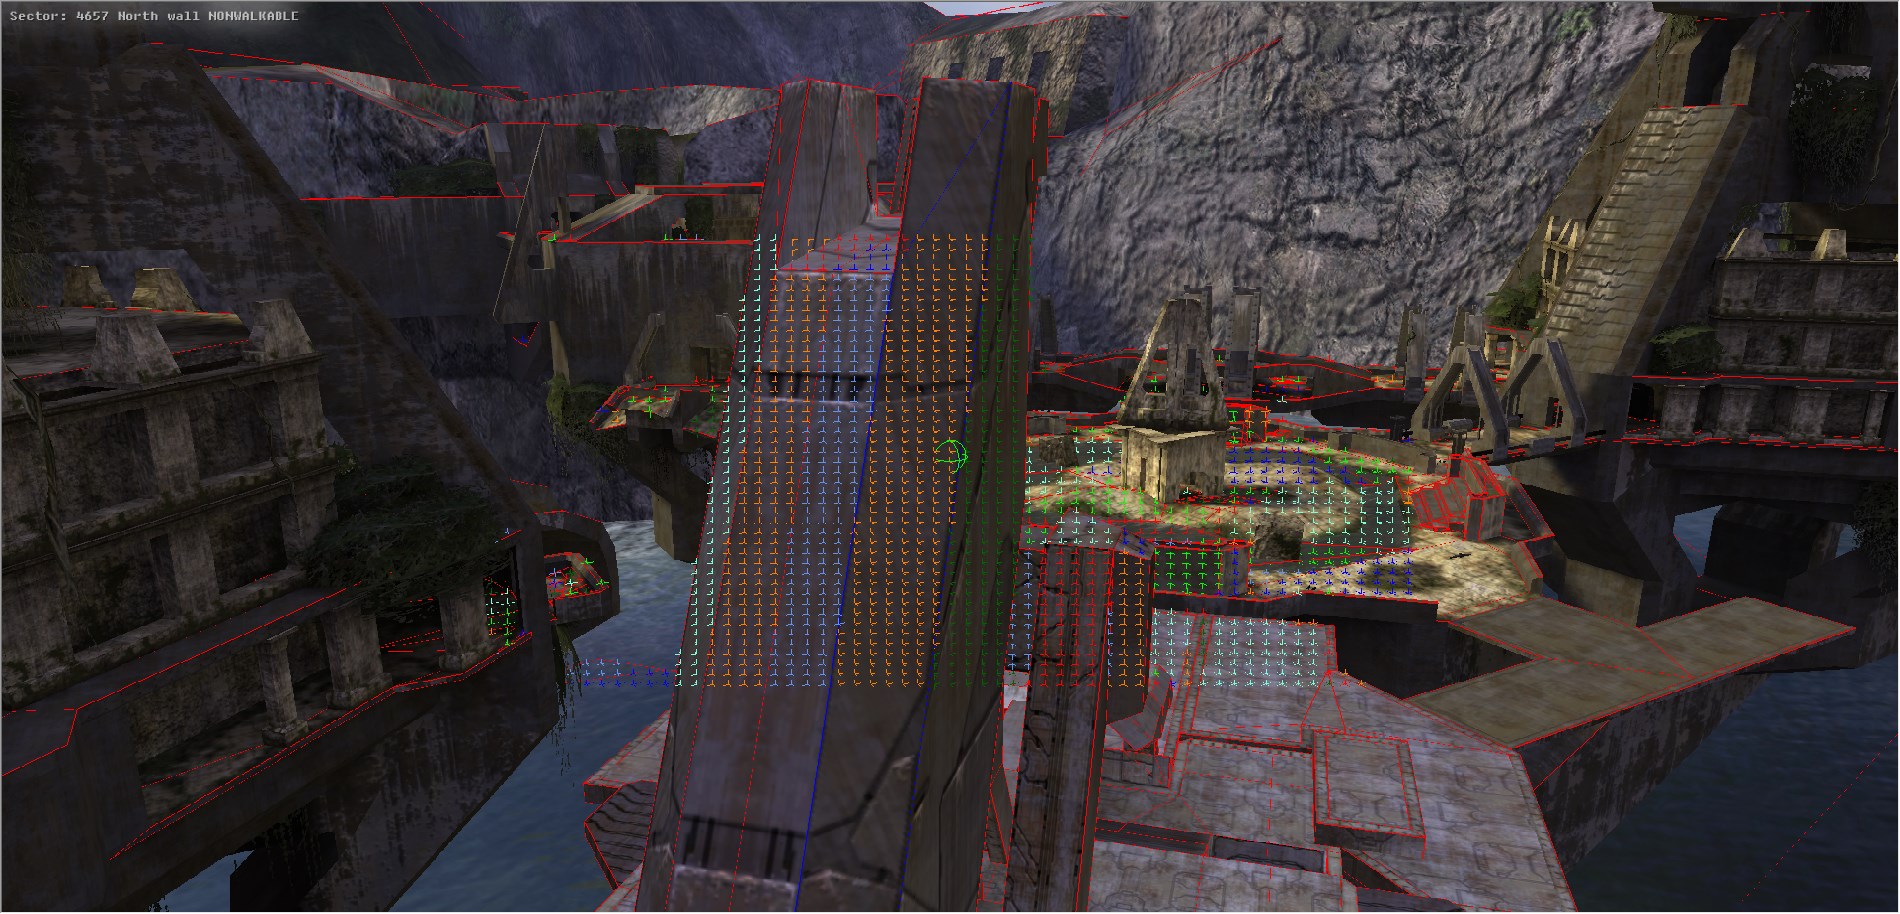
Figure 7. ai_render_sectors 1 and ai_render_sector_bsps 1 used on 05b_deltatowers. The coloured dots represent the sector (colour is generated from the sector ID) and the colour ball in the centre represent the section with is getting it's information printed in the top left. if the surface the ball is on has no sector it will be red, otherwise it will be green for device machines and a random colour based on the sector ID for all other sectors.
You can see what path (if any) an AI would take using the structure data ⇒ pathfinding debug hierarchy entry. Use the left and right click to select start and end points respectively. If no path can be found the reason will be printed on screen. If the distance is too long the whole path wouldn't be rendered but some of it will be and the on-screen message will inform you that it was able to find a path.
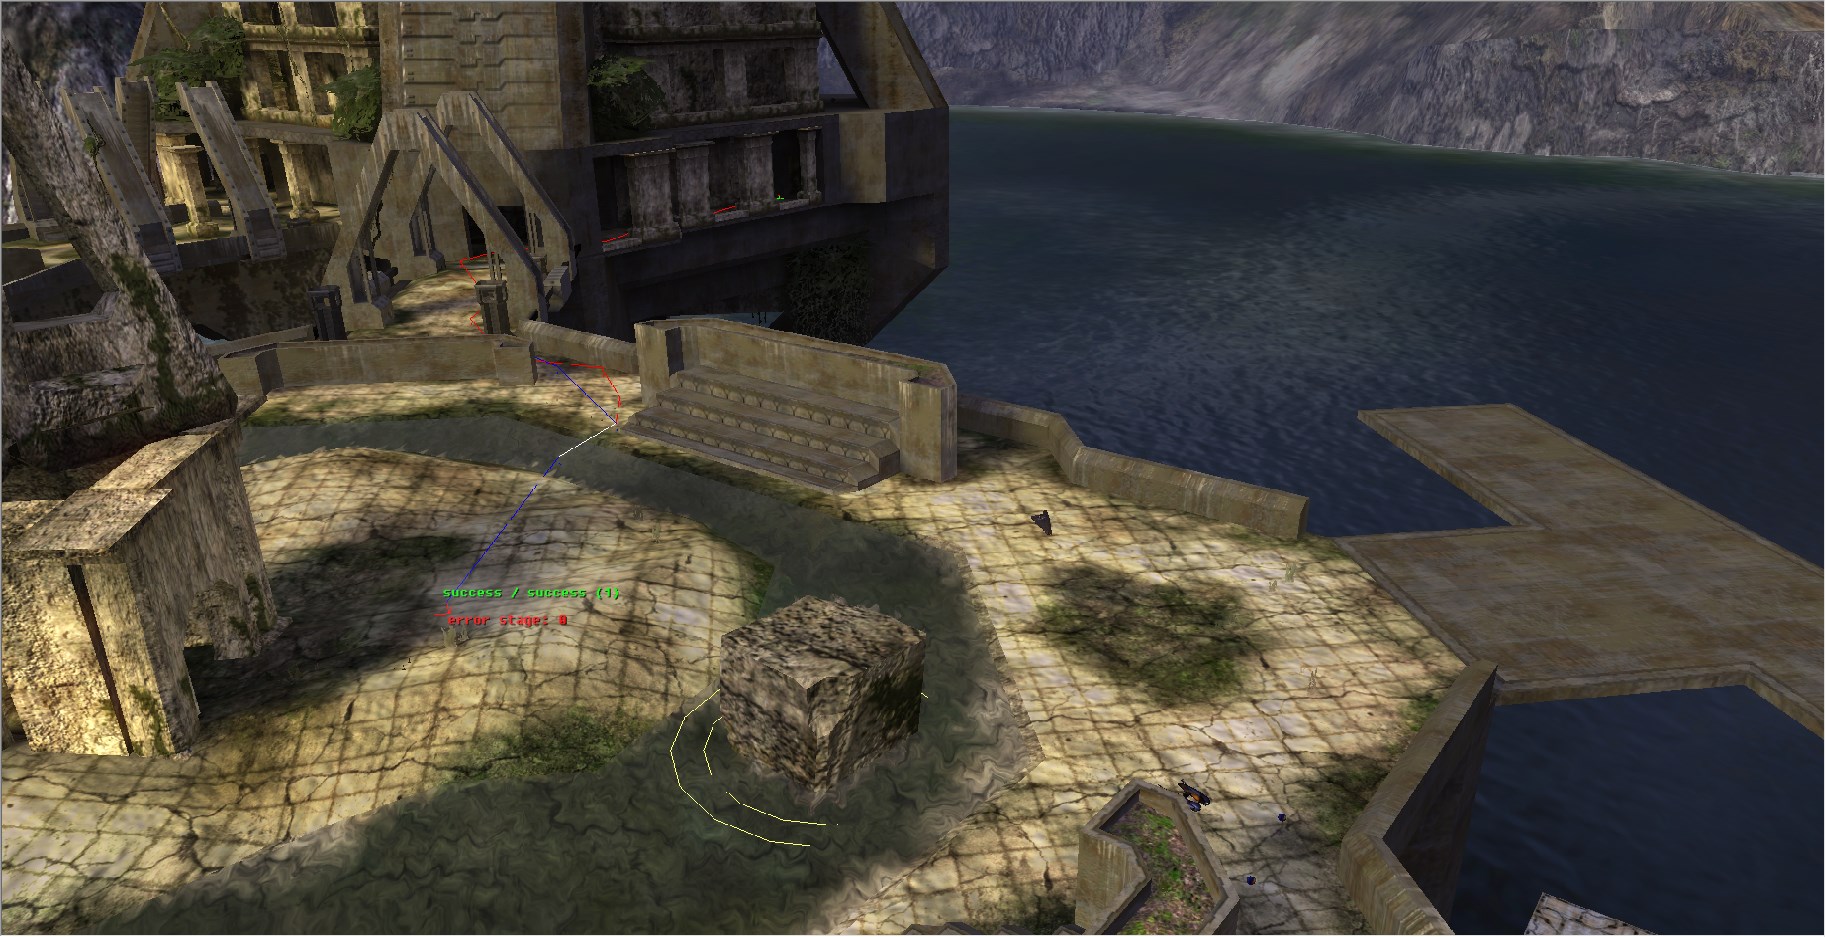
Figure 8. Pathfinding debug used on 05b_deltatowers.
If you have any instances or scenery that use cutout you need to ensure they actually intersect with the BSP, otherwise they wouldn't get cutout and pathfinding system wouldn't be aware of them.
If you want to find sectors that have pathfinding but aren't marked as walkable you can use ai_render_non_walkable_sectors 1. This is somewhat of a misnomer as it seems to only mark floor sectors that are non-walkable not all non-walkable sectors.
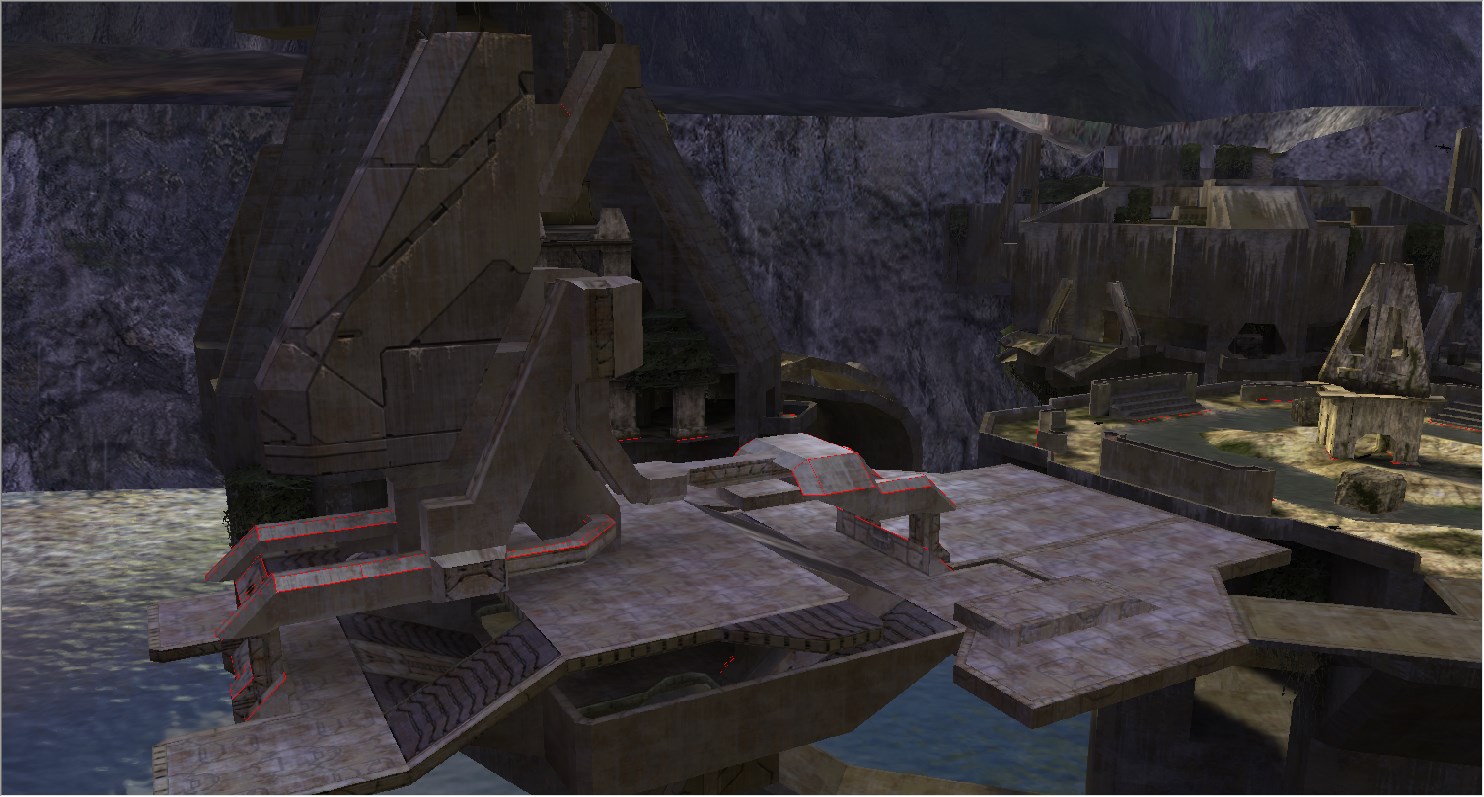
Figure 9. ai_render_non_walkable_sectors 1 used to find non-walkable sectors on .05b_deltatowers. The device machine has a lot of them but the sides aren't marked despite being non-walkable because they are no floor sectors.
Optimisations
A complex pathfinding can cause issues for AI - it's better for the mesh to be as simple as possible. Long and narrow sectors are a common issue, these can make the AI move in a weird way when navigating in their vicinity. If there is a particularly problematic area/junction you can use a cookie cutter of the appropriate size to remove it. Don't over-use this or make the cutter too large as cookie cutters remove the pathfinding and that can cause it's own issues. In general well optimised collision geometry should generate good collision geometry.
Scenery tag considerations
The scenery tag defines the default pathfinding policy for a scenery object. Set this to whatever is most reasonable for that scenery item.